

 Free On-site Quote and Samples
Achieving a perfectly level subfloor is crucial for the successful installation of any flooring. Whether you’re working with a wooden-based subfloor or concrete cement, this guide will walk you through the essential steps to ensure a smooth, even surface. Here, we’ll cover three primary levelling methods: sanding, grinding, and using a self-levelling compound.
Assessing Your Subfloor
Before beginning any levelling process, it’s essential to assess the current condition of your subfloor:
- Inspect for Damage: Check for cracks, rot, or other damage.
- Measure Levelness: Use a level or straightedge to identify uneven areas.
- Clean the Surface: Remove any debris, dust, or old adhesive.
Levelling a Wooden-Based Subfloor
- Sanding
Sanding is ideal for minor unevenness or high spots on wooden subfloors.
- Tools Needed: Floor sander or handheld belt sander, vacuum.
- Procedure:
- Secure any loose boards.
- Sand high spots until the surface is even.
- Vacuum thoroughly to remove all dust.
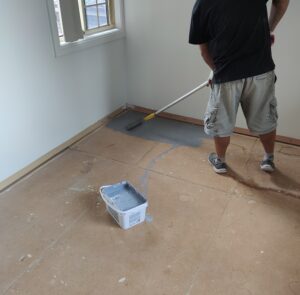
- Self-Leveling Compound
For more significant unevenness, a self-leveling compound can create a smooth, level surface.
- Tools Needed: Self-leveling compound, primer, mixing bucket, trowel, smoothing tool.
- Procedure:
- Apply a primer to the subfloor to ensure proper adhesion.
- Mix the self-leveling compound according to the manufacturer’s instructions.
- Pour the mixture onto the subfloor and spread it evenly using a trowel.
- Use a smoothing tool to eliminate bubbles and ensure a uniform surface.
- Allow the compound to cure fully, as per the manufacturer’s recommendations.
Leveling a Concrete Cement Subfloor
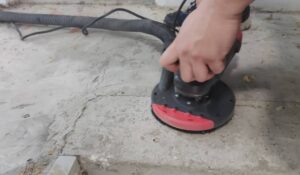
- Grinding
Grinding is effective for high spots and rough surfaces on concrete subfloors.
- Tools Needed: Concrete grinder, dust mask, vacuum.
- Procedure:
- Mark the high spots on the floor.
- Use the concrete grinder to smooth out these areas.
- Vacuum up all dust and debris.
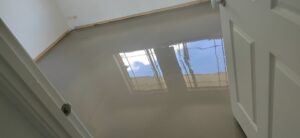
- Self-Leveling Compound
For dips and low spots, a self-levelling compound is the best solution.
- Tools Needed: Self-leveling compound, primer, mixing bucket, trowel, smoothing tool.
- Procedure:
- Clean and prime the surface to ensure proper adhesion.
- Mix the self-levelling compound as directed.
- Pour the mixture over the subfloor, spreading it evenly.
- Smooth the surface with a trowel, removing air bubbles.
- Allow the compound to dry and cure completely.
Tips for Best Results
- Safety First: Always wear appropriate safety gear, including dust masks, gloves, and eye protection.
- Follow Manufacturer Instructions: Whether using a sander, grinder, or self-levelling compound, adhere to the manufacturer’s guidelines for best results.
- Check Your Work: After levelling, use a straightedge or level to ensure the surface is flat and even.
- Allow Proper Drying Time: Make sure any compounds or adhesives are fully cured before proceeding with floor installation.
By following these steps, you can ensure a perfectly level subfloor, providing a solid foundation for your new flooring. For professional assistance or more detailed guidance, don’t hesitate to contact MTE Floors Pty Ltd. We’re here to help you achieve the best possible results for your flooring project.
